Construction
Understanding the Swimming Pool Installation Process from Start to Finish
Take a look at the step-by-step process of building one of our Orlando, Jacksonville or Tampa swimming pools. You will be able to see the skill and craftsmanship of our Orlando pool builders as a bare piece of land becomes the pool of you and your family’s dreams.
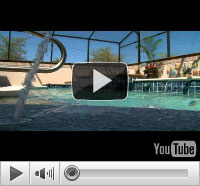
Watch Our Swimming Pool Builders at Work
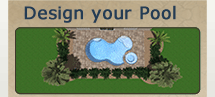
- The first step in the construction process is meeting with one of our skilled Orlando pool designers to find out what you want in your pool. The designer then creates a 3-D rendering of your dream creation. To get ideas, take a look at our pool builders’ sample designs.
- Once the design is finalized and we obtain the necessary permits for your Orlando, Jacksonville or Tampa pool, our construction superintendent meets with you and your family to fully explain the pool installation process. Meanwhile, our excavator strips the sod and prepares the area for construction.
- After the sod is stripped and hauled away, the forms are staked out in the shape of your pool in preparation for the hole to be dug and shaped.
- When the forms are completed, the backhoe and dump truck arrive to dig the hole and haul away any extra dirt. The hole is handcrafted by a skilled shaper using the backhoe.
- After the digging and shaping are completed, the plumbing under the swimming pool is installed. The steel is bent and tied into place before installing the gunite.
- Once the steel inspection has been approved, the gunite is pneumatically applied to the steel and hand-carved into shape. Don’t miss the chance to watch this process! The skills of these craftsmen are amazing. After the gunite is completed, you can start to picture your dream pool coming together!
- During the rough grade portion of the building, the forms are removed. Then, the ground is graded, and we install the plumbing, tile and deck.
- Once the rough grade is completed, our plumber installs the remainder of the underground plumbing around the swimming pool and sets all of the pool’s equipment in place.
- After the plumbing is completed, the waterline tile is installed around the perimeter of the swimming pool.
- Now that the tile phase is completed, the deck and footers are formed. The cantilever forms are now installed on the tile to shape the edge of the deck.
- After the deck inspection and form work is completed, the concrete is laid out by one of our expert concrete finishers. The finished concrete leaves a nice, flat surface for our texture crew to apply the acrylics.
- After the textured acrylic has been pneumatically applied and troweled, the deck is ready for its first coat of paint. The entire deck gets a fresh coast of 100 percent acrylic deck paint in your chosen color.
- At this point in the construction process, the grading crew comes out to tidy up the site and put the finishing touches on the grade.
- After the final grade, the temporary screen enclosure is installed along with the safety barrier to prepare for the barrier inspection, prior to the installation of the pool interior.
- Before the interior can be installed, the entire pool is cleaned out, and the step tile is installed. You’re getting closer to swim time!
- Now that the interior swimming pool installation is completed, the pool is filled with water. One more step, and it’s time to swim in your new Orlando, Tampa or Jacksonville swimming pool!
- Once the pool is completely filled, our service technician turns on the pool equipment, cleans up and balances the chemicals. It’s time to jump in and start enjoying life with your All Seasons Pool!
Please note that the process will vary somewhat with each pool because each one is unique and custom built to our customers’ preferences. To see more examples of All Seasons Pools’ finished work, visit our Tampa pools gallery. And give us a call today at 877-410-7665 to get started on building your backyard oasis.